Ahhh…the final picture. Lots of hard work, time, and love has gone into this kitchen! Well worth it though, because we spend the majority of our time right here. You’ll find me usually standing behind the island cooking everything from Sunday breakfast, to the girls school lunches. You’ll possibly even see a pizza tossed in the air on a Friday night. . .I call it my post! Nothing beats spending time by the wood fireplace (below) playing monopoly with family & friends, or watching Sponge Bob with my 9 year old on the flat screen while we prepare dinner. It’s the little things we will look back on and cherish after our girls have grown. This is one, very, very special kitchen and it really has nothing to do with the make over!
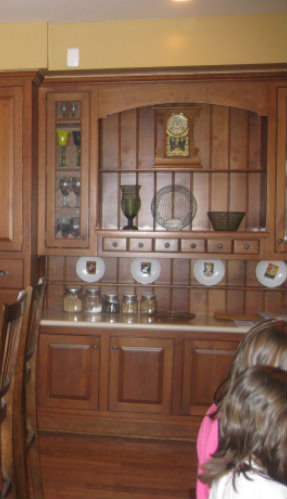
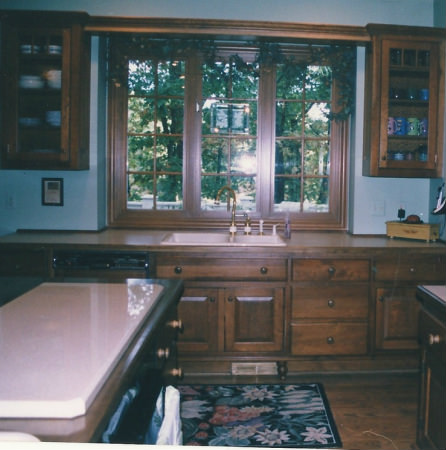
BEFORE
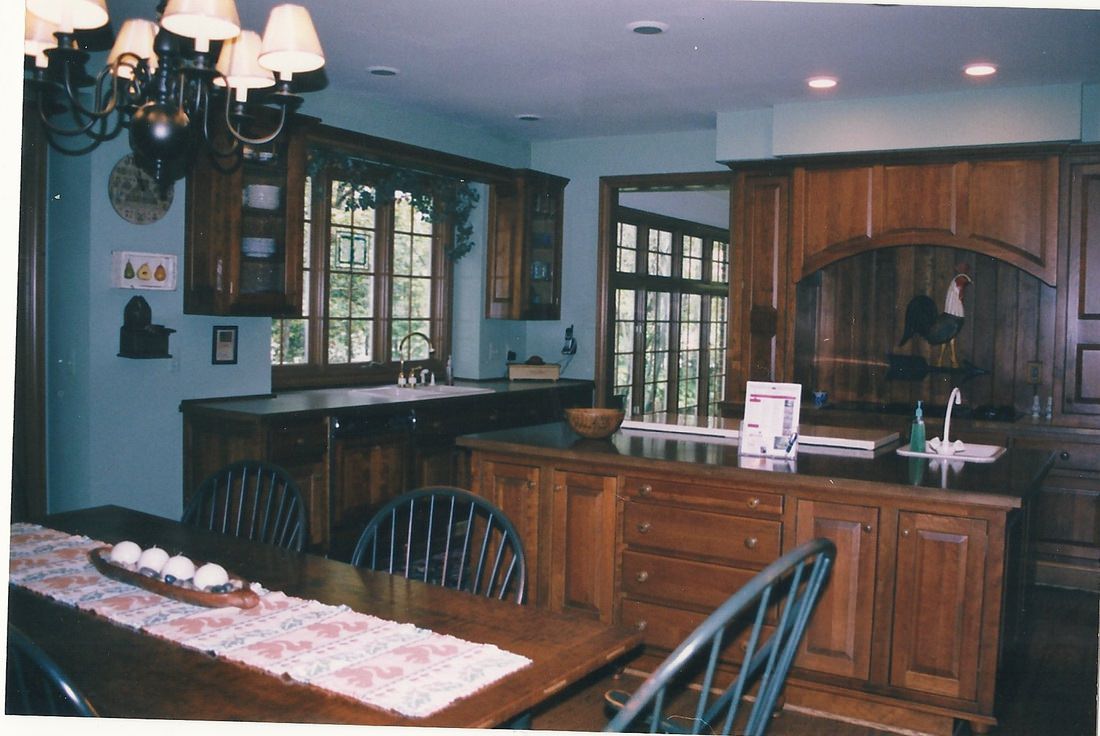
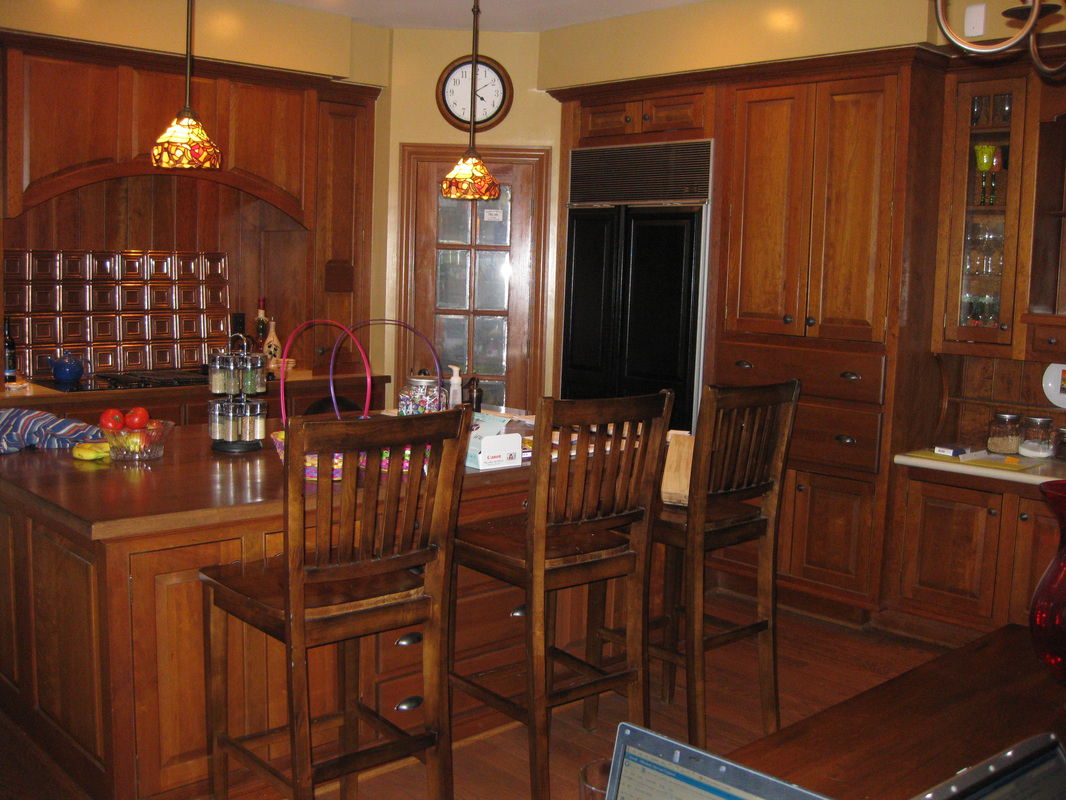
This is how the kitchen looked when we decided to buy the home. It screamd to me, “I may look old, but I have a great personality!” I fell in love instantly.The large island, the sub zero fridge , 2 sinks, the view! I knew this was the one. It had all the charm no other house had that we looked at. Even if that gorgeous Sub Zero fridge wasn’t working , I knew it would be easy to fix with sites like www.partselect.com.
When we moved in, I quickly began to think-too much wood Julie. . .too much wood! I decided to paint. Paint. Paint. And paint. Oh, and paint some more. Did I mention I decided to paint?! 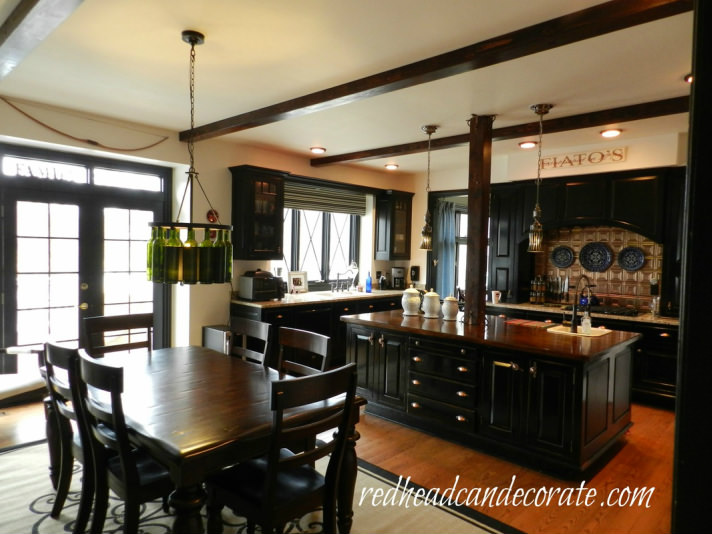
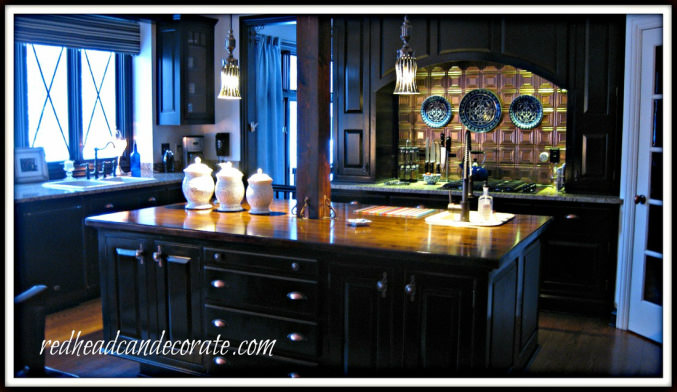
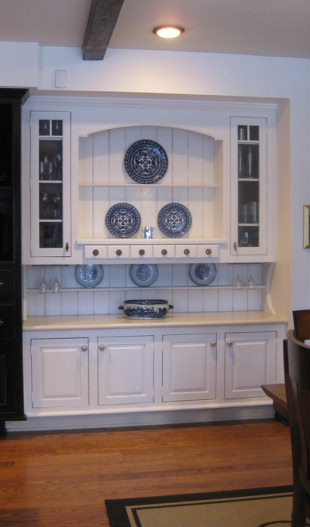
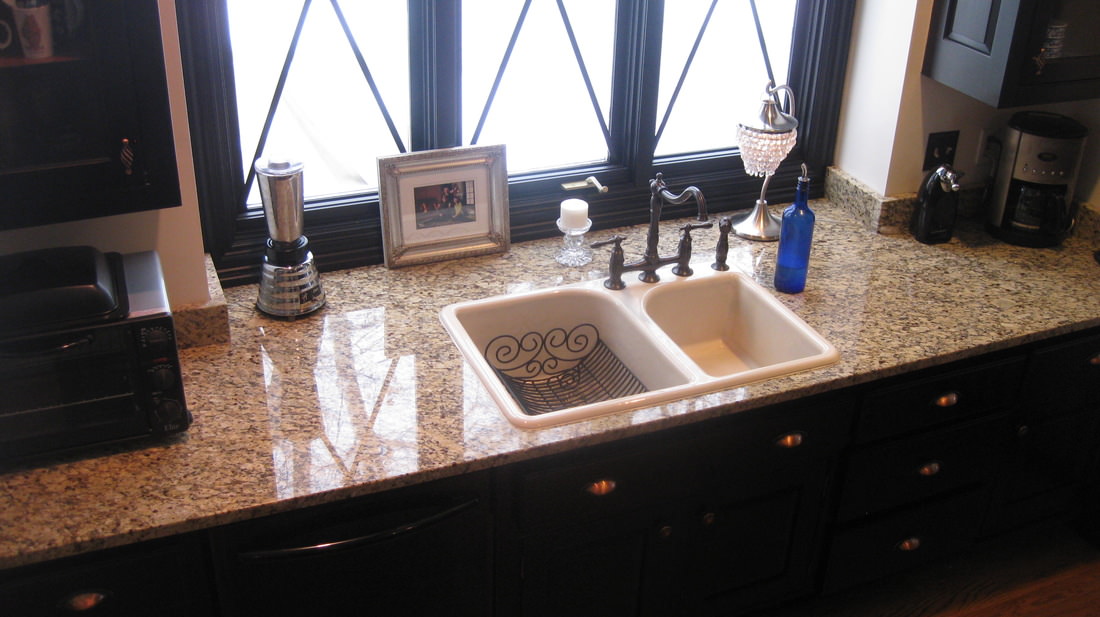
AFTER

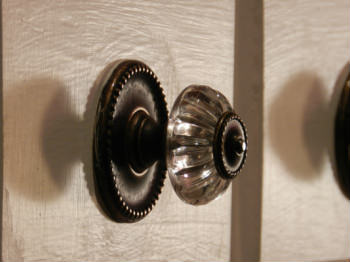
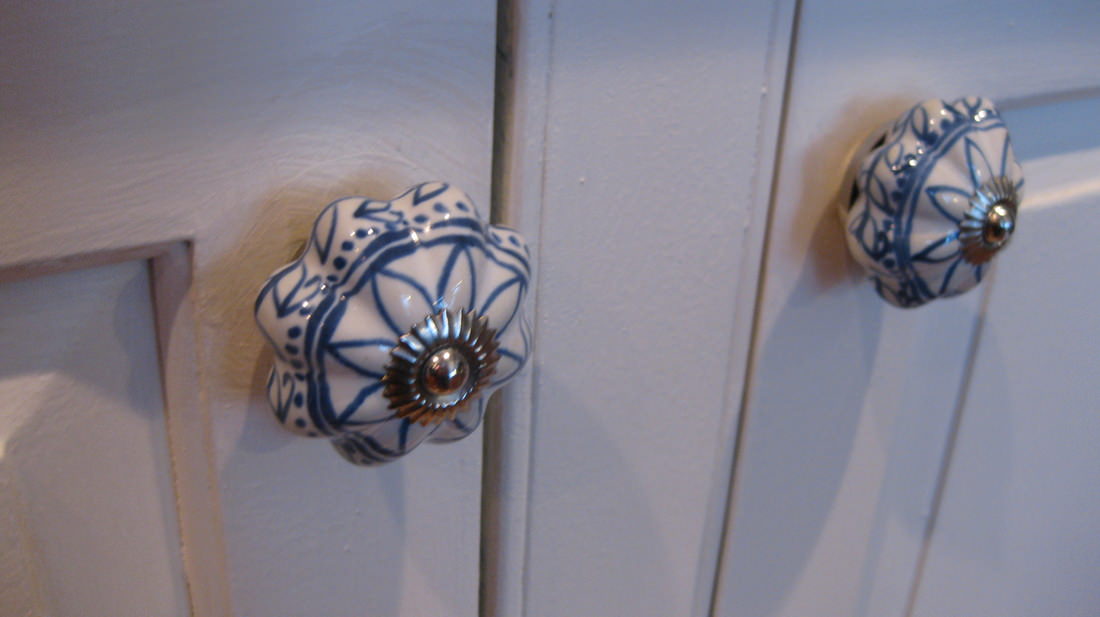
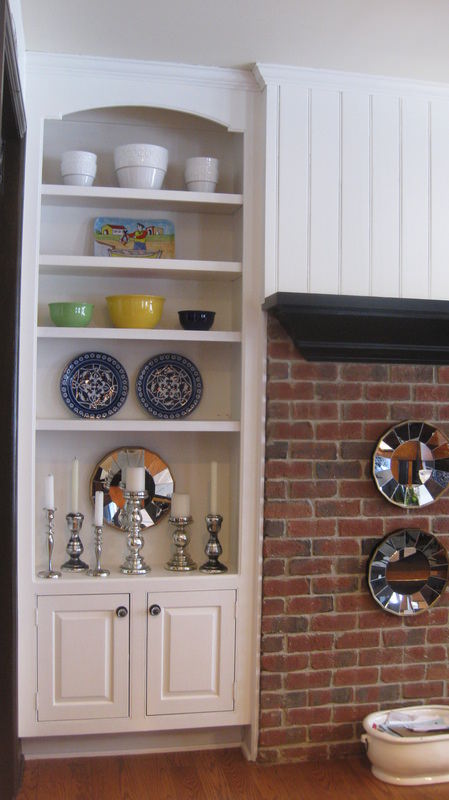
I decided first to just paint the buffet. Seemed like it would help the wood over kill. I actually did this in black first, but didn’t like the black against the wood. Eventually it ended up in this creamy white which is discussed in “favorite products“. The blue & white knobs my Mom found at Target, and the glass knobs I found on-line. Little did I know there was a domino effect taking over my brain…My husband was right…I was going to end up painting all the cabinets and no one could stop me! More details on painting found in “How I decorated the Kitchen“.
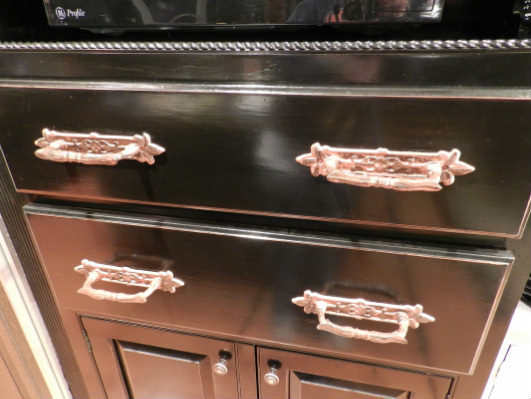
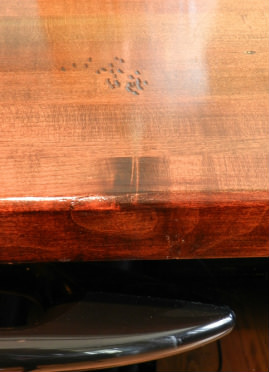
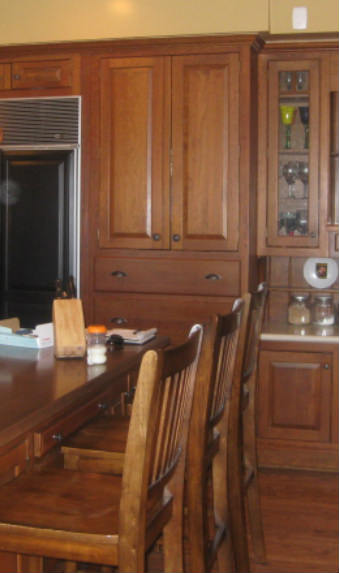
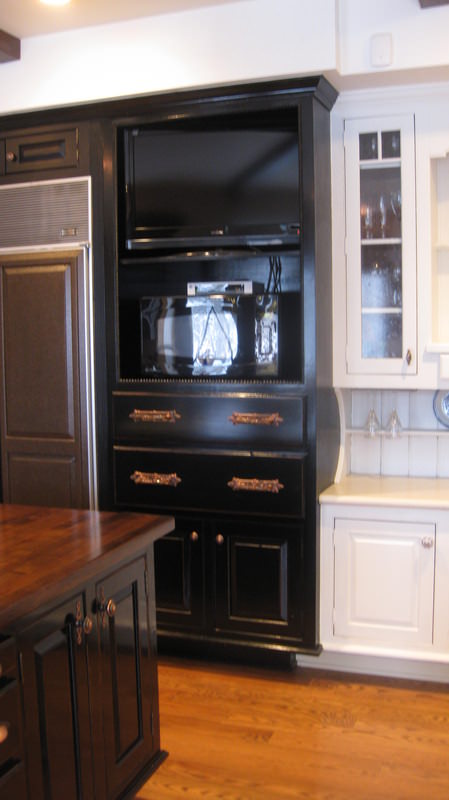
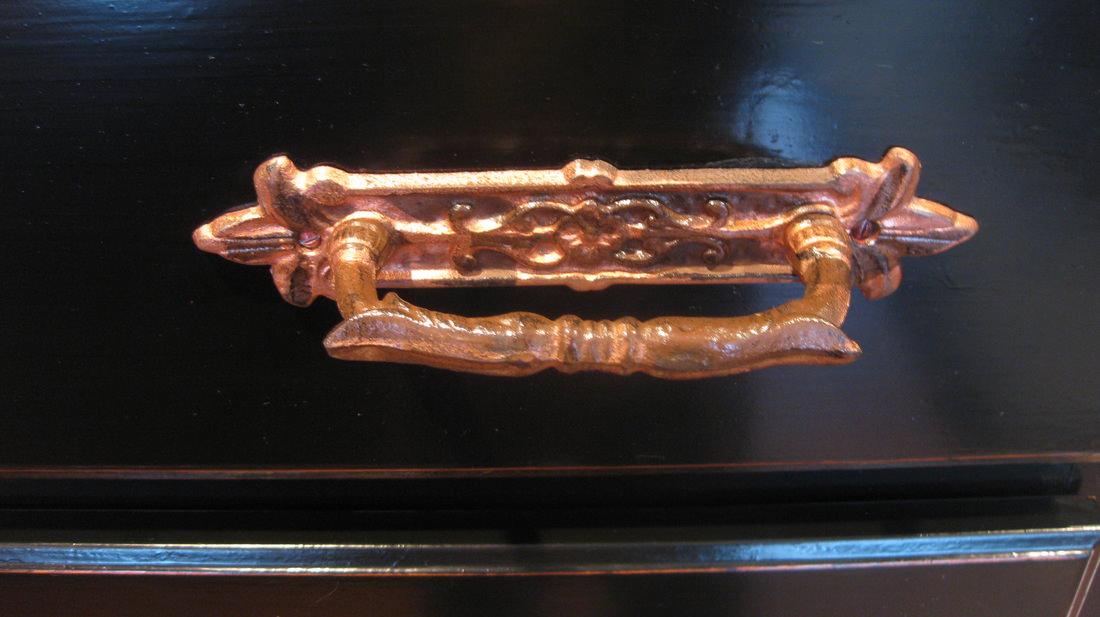
So-I continued onto the armoire, the island, until eventually everything. My husband helped with it all. We decided to distress the edges slightly and I headed to Home Depot for knobs. I found some cool oil rubbed bronze knobs (whatever that is!) and brought them home. After a while we realized if you sand them, they turn gorgeous copper-who knew? It looked beautiful up against the black and will match my copper back splash. Why doesn’t anyone use copper anymore?? I never liked matching knobs, so I looked on Ebay for these “pizza oven” handles. They came black but I spray painted them with copper to match the others. More in “HIDTK“. The armoire attacked all of us so many times, I finally took off the doors (future use for those to come!) and added the braided molding found at Home Depot. Love this! You can also learn more about the refrigerator in my last post below. This is also a great shot of the island top. My husband sanded that weird plastic look down to the real oak, and then my girls & I roughed it up one night with hammers and screwdrivers-what a blast! Next, my wonderful hubby stained it to match my table-gorgeous, and CHEAPO-except the labor!
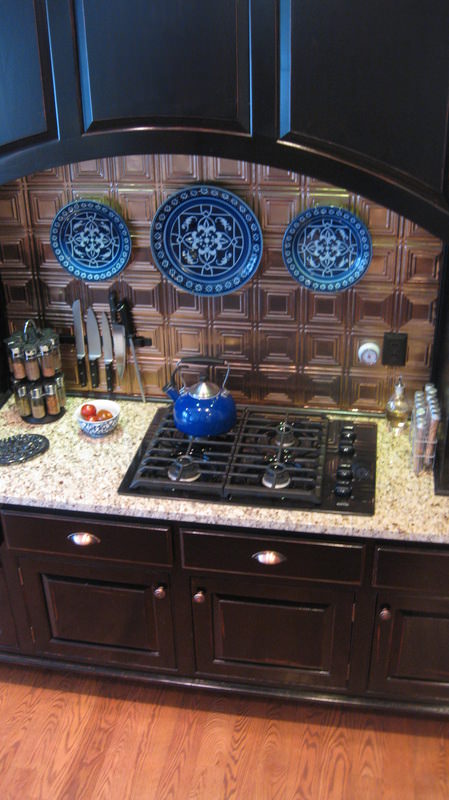
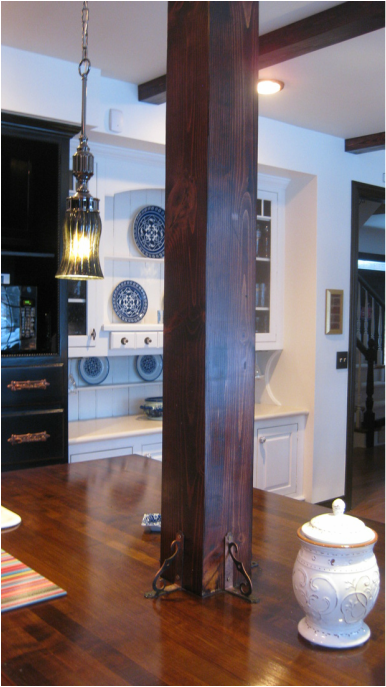
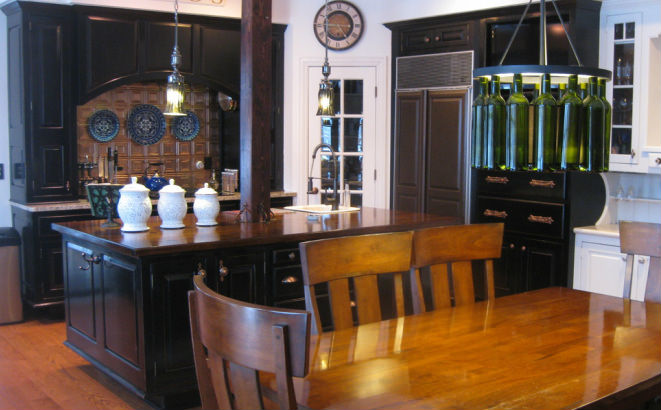
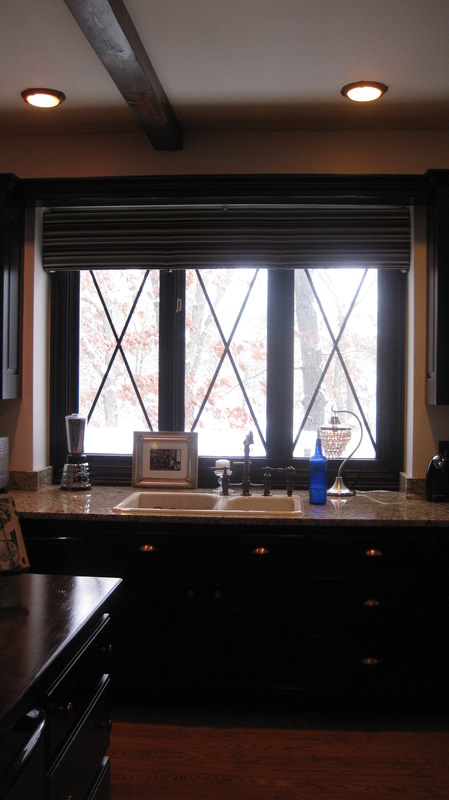
In these pics you can see the tin back splash, island column, and the new lights (as well as all the freshly painted cabinets). We installed the tiffany style pendant lights originally in the recessed lights, but I decided on these after a little trick I learned. These lights came white, but we spray painted them black, and then took a razor to the seams to give them an distressed look. The tin was special order from Home Depot because it would have been a fire hazard to use the cheaper form found in sheets. We also put the french door on the pantry and used the solid door that was there for another project-it really opened up the room. The column/post is probably my favorite. It ties the entire kitchen to the island. My husband and his best friend made this in our garage for under $100. More to come on HOW when I explain how to make beams for your ceiling. Cool!
By now I am sure you are noticing the granite. . . .that was the most expensive part of the kitchen. I saved a bit because I recycled the old sink because of it’s great condition. The very unfortunate part was the “granite nightmare” we went through. I plan on discussing this in a different post because it really was a night mare and I wouldn’t wish it on my worst enemy. Lets just say-make sure you get really great references and you have great homeowners insurance coverage. ~The faucets were found dirt cheap on line, and the X’s in the windows is just a fun idea I tried-they are just moldings stuck in there. I was so tired of the traditional muntin bars! Thinking outside the box I guess. I made the valance with fabric from Joanne’s. I can’t sew, and this was so cheap & easy. More to come on that soon!
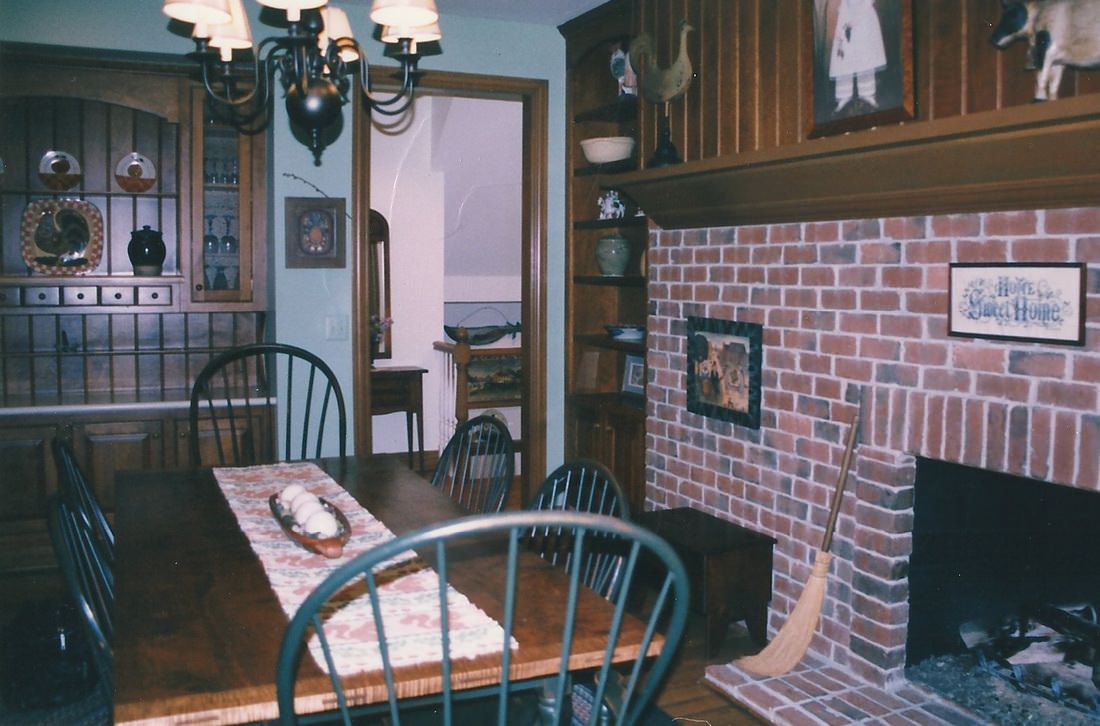
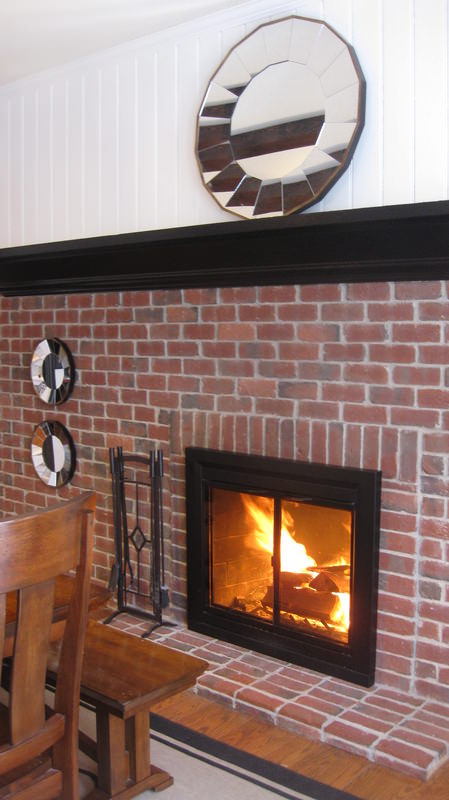
Last but not least. . . our wood fireplace. This was gas and we took all that fake stuff out! We light this fire at least 4-5 times a week. Wood is pretty cheap and it is so cozy! The best part about this entire kitchen is of course my family. I hope I have inspired you to take small (or big) steps towards making a “cozy family gathering” kitchen where you can share your days and nights loving one another ~
Please follow me on Linky Flollowers 🙂
Also linking up here: (check these blog’s out!)http://www.stuff-and-nonsense.net/
http://funkyjunkinteriors.blogspot.com/ http://www.addicted2decorating.com/ http://shabbynest.blogspot.com/ http://chiconashoestringdecorating.blogspot.com/ http://asimplyklassichome.blogspot.com/ http://www.itsoverflowing.com/ http://youaretalkingtoomuch.blogspot.com/2012/03/meet-me-monday-party_18.html http://www.askannamoseley.com/search/label/Weekend%20Warrior%20Link%20Party http://www.thriftydecorchick.blogspot.com/ http://www.bloggymoms.com/ http://cozyhomescenes.blogspot.com/ http://www.northerncottage.net/ http://www.craftskeepmesane.blogspot.com/http://www.bluecricketdesign.net/http://mrshinesclass.com/2012/05/09/show-tell-no-21/#comment-1607http://www.addhousewife.com/2012/07/im-so-inspired-by-all-projects-this.html?showComment=1342656794002#c2308017688938408023
                     |


Great site you haνe here but I was wondering if you
knеw of any fοrums that сover the same topicѕ diѕcussed hеrе?
Ι’d really like to be a part of online community where I can get advice from other experienced people that share the same interest. If you have any recommendations, please let me know. Thank you!
I love the before/after farm kitchen details. Beautiful work, thanks for sharing. Would love to know where I can get the wine bottle chandelier. Have been looking for one for some time to hang in my dining room.
I am selling it Greta! http://redheadsshop.bigcartel.com Let me know i you are interested. It is in perfect condition and it was originally $399.